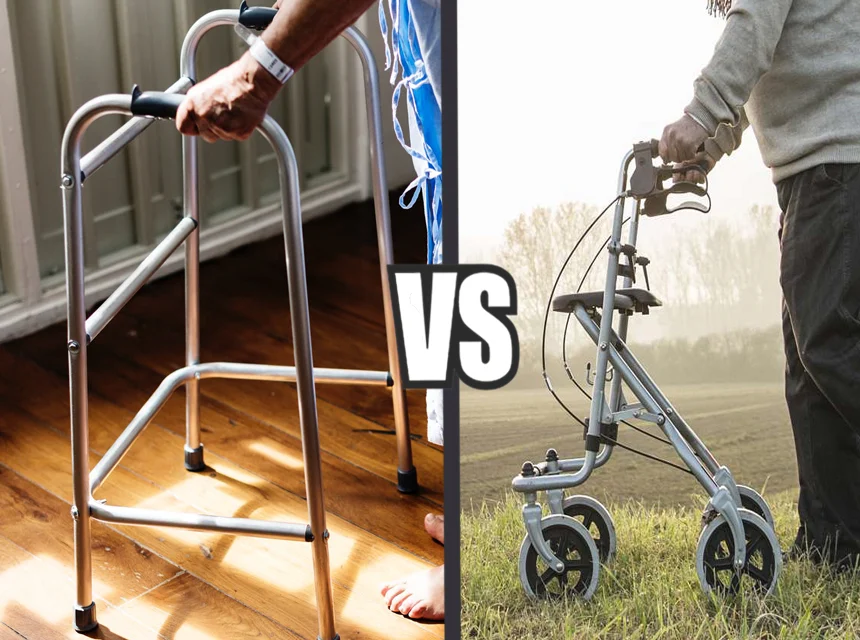
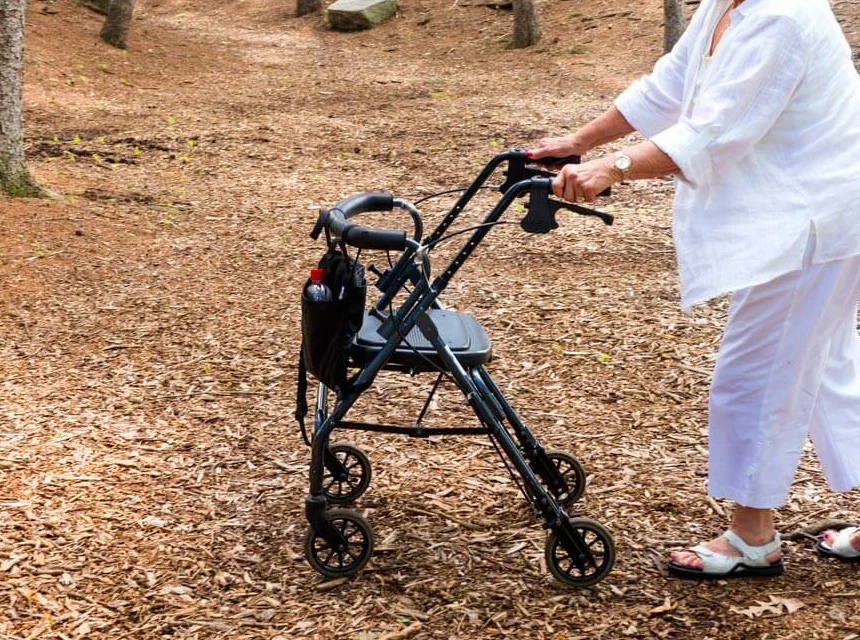
Learning to use a new walker brings many challenges. You need to master balance and control speed. Additionally, you must learn to navigate corners without bumping into things. However, the last thing you want is your walker leaving scuff marks on your beautiful hardwood floors.
Walkers, especially standard manual ones with rubber feet or wheels, can scratch wooden flooring. This creates extra stress and cleaning for seniors and caregivers alike. Fortunately, protecting your floors is possible without giving up your walker’s benefits.
Whether you use a walker or care for someone who does, this article provides simple solutions. We’ll cover modifications to the walker itself and changes in your home environment. This way, you can mix solutions for the best results.
By Nan J.Corbo | ✅ Reviewed by Ray Butcher |
SeniorFitness is reader-supported. We may earn a commission through products purchased using links on this page. Learn more about our process here
TL;DR: Quick Walker Floor Protection Solutions
TL;DR: To protect hardwood floors from walkers, equip the walker’s legs with soft protectors like tennis balls, rubber glide caps, or felt pads. Also, consider placing thin area rugs or runners on key floor areas. These modifications let the walker glide gently without scuffing wood. Keep floors clean since grit can cause scratches. Use non-slip rug backings to prevent trips. Each option has pros and cons – read on to learn which floor-protection strategy best fits your needs!
How to Protect Hardwood Floors by Modifying Your Walker
The first approach to floor protection involves adding cushioning or gliding attachments to your walker. This section lists various walker accessories that prevent scratches. They create a soft or smooth barrier between the metal walker and wood floor. All are inexpensive fixes that seniors or caregivers can implement easily.
Tennis Balls on Walker Legs – A Classic Floor Protection Fix
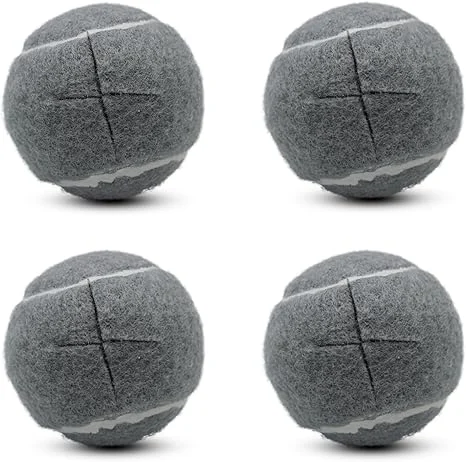
Tennis balls remain the most popular walker floor protector. You cover the walker’s legs with ordinary tennis balls that have slits cut into them. This prevents direct metal-to-floor contact and cushions the walker’s impact.
How to Use: Cut an “X” slit into regular tennis balls and pop them onto each walker leg. Alternatively, buy pre-cut tennis balls from medical supply stores or online retailers.
Benefits:
- Protects floors from scratches and black rubber skid marks
- Creates quieter movement by muffling noise on hard floors
- Enables easier gliding since the fuzzy surface offers controlled slide
- Provides high visibility with bright colors for better depth perception
Drawbacks:
- Absorbs moisture and dirt, potentially harboring mold or causing rust
- Picks up dust and germs from floors, creating hygiene concerns
- Wears out and flattens over time, requiring periodic replacement
- May become too slippery on very smooth surfaces, reducing stability
Expert Tips: Insert plastic caps inside cut tennis balls to block moisture from entering walker legs. Keep extra sets handy for replacement. Tennis balls work best indoors on smooth floors. Avoid using them on rough outdoor surfaces like concrete.
Rubber Foot Pads and Furniture Pads – Stick-On Floor Protectors
These rubber or felt pads work like furniture protectors under chair legs. You stick them to the bottom of each walker leg. Many hardware stores sell walker-specific foot pads, or you can use heavy-duty furniture pads.
How They Help: Pads provide soft, non-abrasive contact with floors. Instead of hard metal scratching wood, cushioned pads glide gently without leaving marks.
Pros:
- Easy peel-and-stick application requiring no tools
- Quiet operation and excellent floor protection
- Low-profile design that doesn’t change walker height
- No moisture absorption unlike tennis balls
Cons:
- Requires careful adhesive placement to prevent wobbling
- Collects debris around edges, reducing effectiveness
- Compresses and wears down with regular use
DIY Option: Cut circles from thick felt or old mousepads, then glue them securely to walker feet.
Walker Glides (Ski Glides) – Smooth “Skis” for Easy Movement
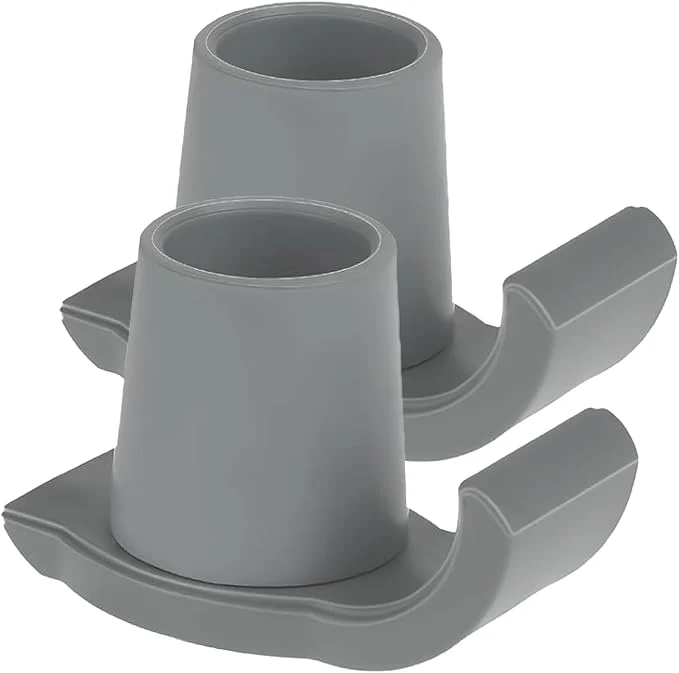
Walker glides are small plastic attachments shaped like mini skis. They fit onto walker leg bottoms and help the walker slide smoothly across floors. Most people use them on back legs while front legs have wheels.
How They Work: These slick plastic skis reduce friction dramatically. Users can push the walker lightly without lifting it completely each step. This makes movement much easier for those with limited upper-body strength.
Benefits:
- Excellent hardwood protection with smooth, rounded surfaces
- Significantly easier mobility requiring less physical effort
- No moisture or dirt absorption, making them more sanitary
- Low maintenance and long-lasting durability
- Better outdoor versatility than tennis balls
Drawbacks:
- May slide too easily on slopes without proper brake usage
- Less visible than bright tennis balls for depth perception
- Requires some installation effort and proper sizing
Pro Tip: Consider having separate glide sets for indoor and outdoor use. This prevents tracking dirt indoors that could scratch hardwood floors.
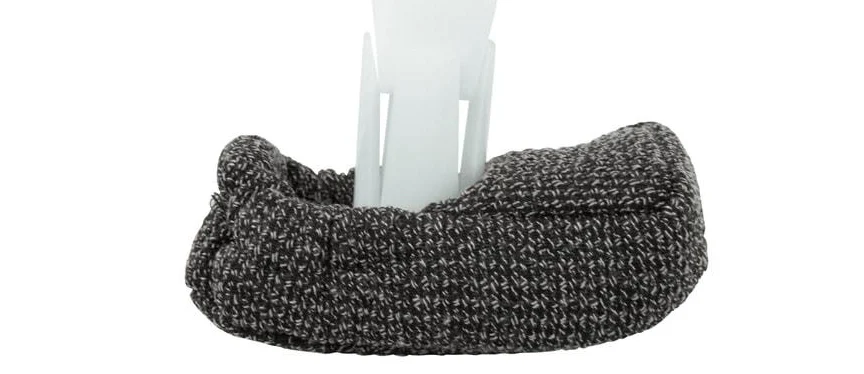
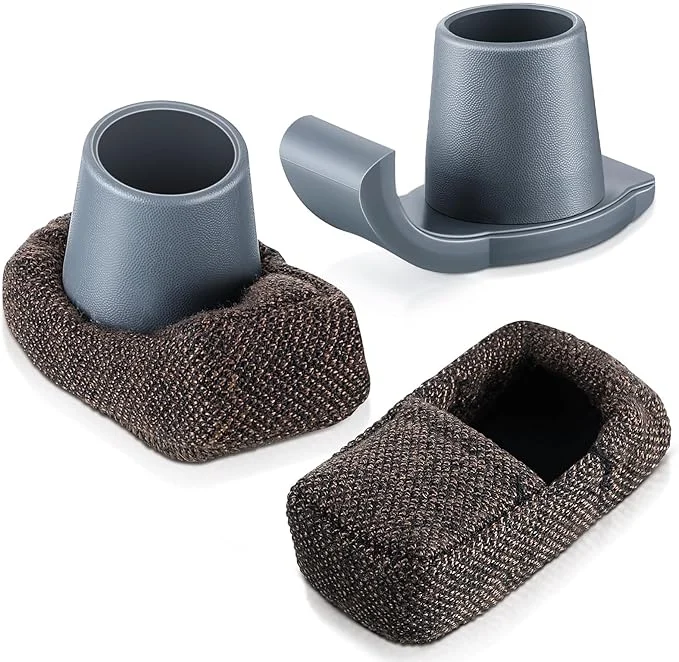
Walker Glide Covers (Fabric “Slippers”) – Extra Floor Protection
These soft fabric covers slip over hard plastic walker glides. They look like tiny booties made of felt, fleece, or similar soft materials. Think of them as socks over shoes for extra floor gentleness.
Purpose: If plastic glides still scratch sensitive floors or make noise, these covers provide ultimate protection. Only soft fabric touches your hardwood, virtually eliminating scuffing risk.
Advantages:
- Maximum floor safety for delicate surfaces
- Ultra-smooth and quiet operation
- Washable and reusable design
Disadvantages:
- Can wear out or slip off occasionally
- Requires regular cleaning to prevent dust accumulation
Ideal Use: Perfect for indoor-only walkers, especially if users tend to drag the walker frequently.
Walker “Socks” (Knitted or Pre-made) – Cozy DIY Floor Savers
Walker socks are thick yarn sleeves that cover walker leg bottoms. You can hand-knit them or buy pre-made versions. Picture short socks with closed ends that pull up over walker rubber tips.
How They Help: Soft yarn creates a gentle buffer between hard walker tips and floors. They eliminate direct scratching while reducing noise significantly.
Pros:
- Extremely gentle on all floor types
- Customizable colors and patterns for personal style
- Inexpensive solution using scrap yarn
- Simple slip-on installation
Cons:
- Limited durability, especially on rough surfaces
- Collects dirt requiring regular washing
- May create more friction than smooth glides
Tip: Make several pairs for rotation. Cut tube sock toes for quick DIY walker covers.
Felt Strips or Discs – DIY Felt Floor Protection
This involves cutting felt material to fit your walker’s foot size. Buy felt strips or furniture pads, then cut them to match walker foot shapes. Glue or stick them securely in place.
How It Works: Felt creates a soft barrier, so metal or hard rubber can’t grind against wood floors.
Pros:
- Custom fit for any walker foot size or shape
- Proven furniture protection material
- Cheap and widely available at craft stores
Cons:
- Needs strong attachment to prevent peeling
- Attracts dirt, dust, and pet hair readily
- Flattens and loses effectiveness over time
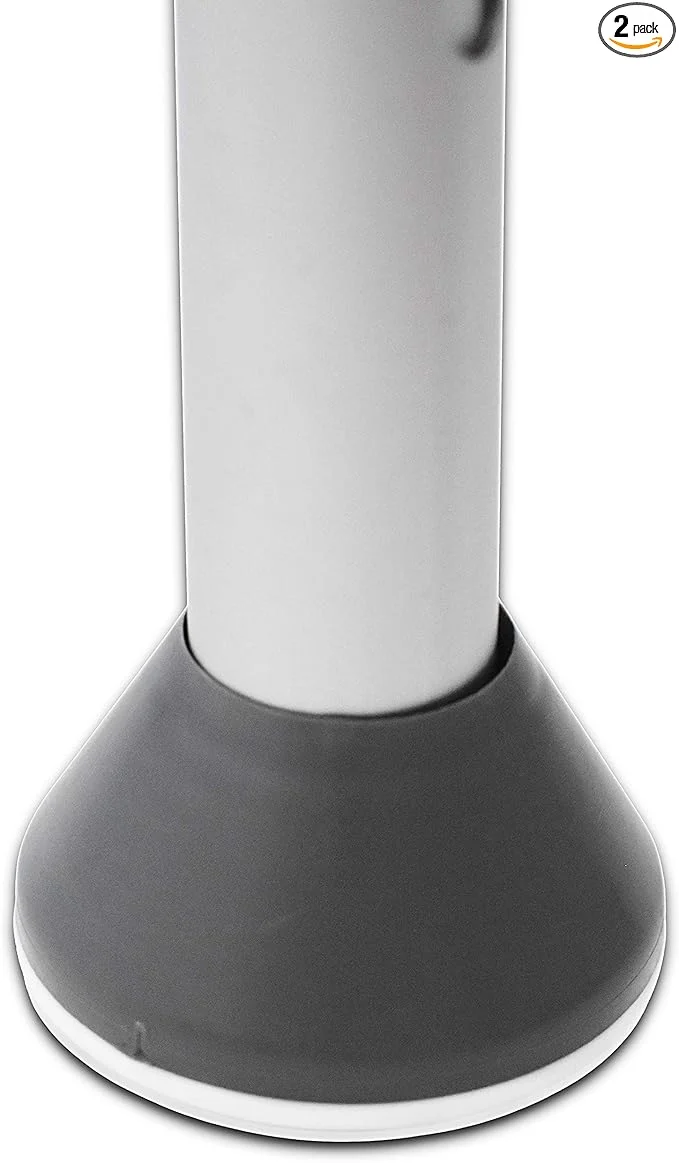
Plastic “Feet” Caps – Slip-On Leg Covers
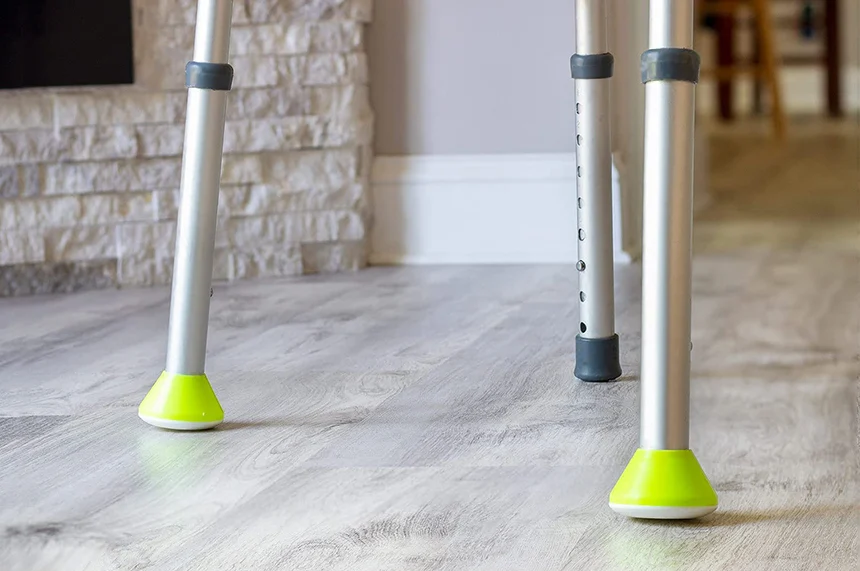
These soft plastic or rubber caps go over existing walker rubber tips. Think of them as upgraded tips made from softer, wider materials. Some feature flat bottoms while others have convex shapes for better gliding.
Benefits:
- Shields floors with smooth rubber or plastic surfaces
- Easy cleaning without debris absorption
- Enhanced stability with wider base design
- Simple removal for rental walkers
Drawbacks:
- Higher cost than some DIY solutions
- Must choose correct “glide” type rather than “non-skid” versions
- Requires proper sizing to fit walker leg diameter
Tip: Look for brightly colored caps like yellow walker coasters. They provide visibility while functioning as durable plastic “shoes” for your walker.
Protecting Your Hardwood Floors at Home
Beyond modifying your walker, you can adapt your flooring environment for added protection. This secondary approach uses rugs, mats, or floor treatments to safeguard wood surfaces. However, these measures require careful implementation to avoid creating tripping hazards.
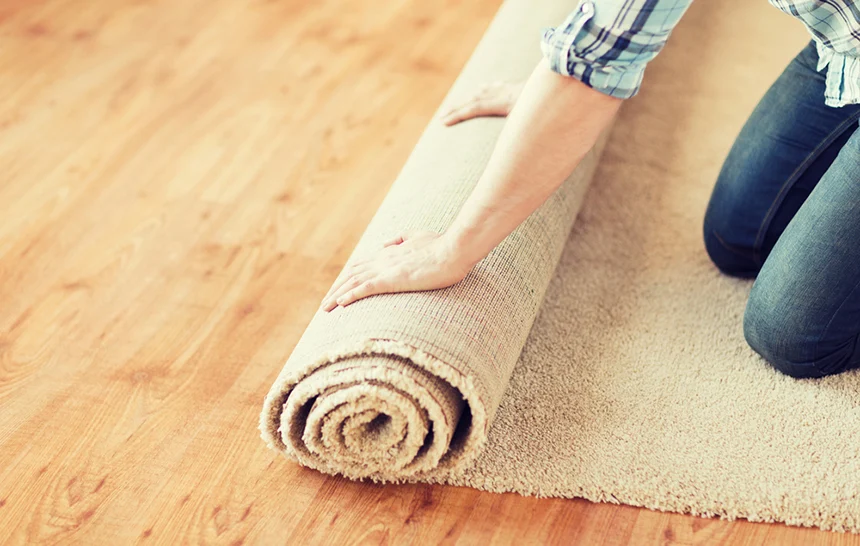
Use Area Rugs and Runners – Cover High-Traffic Walker Zones
Place thin, durable area rugs or floor runners on hardwood sections where your walker travels most. For example, low-pile rugs in hallways, beside beds, or in living rooms protect wood in high-use areas.
How It Helps: Rugs act as sacrificial layers. Your walker glides over rugs instead of directly on wood, preventing scratches. Any scuffing happens to replaceable rugs, not your permanent floors.
Best Rug Types:
- Choose low-profile, tightly woven rugs
- Select “low pile” or “flatweave” styles like indoor/outdoor rugs
- Ensure appropriate sizing to cover walker paths completely
- Avoid thick plush carpets or long-fringe edges
Safety Considerations: Use non-slip rug pads under each rug to prevent sliding. Secure rug edges so they lie completely flat. Watch for curled corners that could catch walker legs. Focus on high-risk areas like doorways and turning zones.
Maintenance: Keep rugs clean since trapped dirt can scratch wood through rug fibers. Vacuum regularly and check that non-slip backing hasn’t shifted.
Floor Runners or Track Mats – Cover Long Walker Pathways
Floor runners are long, narrow rugs perfect for hallways. You can also use clear plastic runners or vinyl mats that create continuous protected paths.
Usage: Lay runners in corridors or routes your walker travels frequently. This keeps walkers almost always on protected surfaces.
Pros:
- Covers extensive ground, minimizing exposed hardwood
- Clear vinyl runners provide protection without changing decor
- Can span entire corridors without problematic middle edges
Cons:
- Plastic runners may not match home aesthetics
- Requires secure attachment to prevent slippage
- Cannot protect 100% of floor space
Protective Floor Maintenance and Cleanliness
Beyond external additions, consider your hardwood floor’s condition. Well-maintained floors resist scuffs better than damaged ones.
Polyurethane Finish: Ensure your hardwood’s protective coating remains intact. Reapply finish in worn high-traffic areas for restored scratch resistance.
Keep Floors Grit-Free: Tiny rocks act like sandpaper under walker tips. Sweep or vacuum walker areas regularly. Clean walker tips after outdoor use to prevent tracking debris indoors.
Door Mats: Place mats at entrances to reduce grit particles that could later scratch floors under walker pressure.
Humidity Control: Maintain moderate home humidity levels. Extremely dry hardwood becomes more scratch-prone, while excess moisture can cause warping.

Extra Tips for Seniors and Caregivers
Work Together: Floor protection works best with teamwork. Seniors should communicate what’s working or causing problems. Caregivers should observe walker use and check floors for early scuff signs.
Choose Your Solution: Every person and home differs. Very mobile seniors might prefer glide skis for effortless movement. Those needing more stability might choose rubber pads with less sliding. Trial and error helps find perfect setups.
Maintain Walker Accessories: Check your chosen method weekly. Are tennis balls wearing thin? Is a glide cap loosening? Replace accessories before they fail to ensure continuous floor protection and maximum safety.
Consider Indoor vs Outdoor Walkers: Use separate walkers when possible. Keep one clean for indoor use while the outdoor walker handles dirty conditions without worry. If one walker serves both purposes, clean or swap attachments when transitioning indoors.
Education and Assistance: Help seniors understand why floor protection matters. Less cleaning, fewer fall hazards, and quieter operation benefit everyone. Involve them in choosing colors or styles for walker accessories.
Mindful Walker Technique: Users should still lift walkers slightly when possible, even with glide accessories. This prevents dragging and reduces floor contact pressure. Use walker brakes when stationary to prevent unwanted rolling.
Handle Minor Scratches: Despite best efforts, minor marks may occur over years. Keep hardwood touch-up markers or polish handy for quick cosmetic fixes. This eases homeowner concerns about every small scuff.
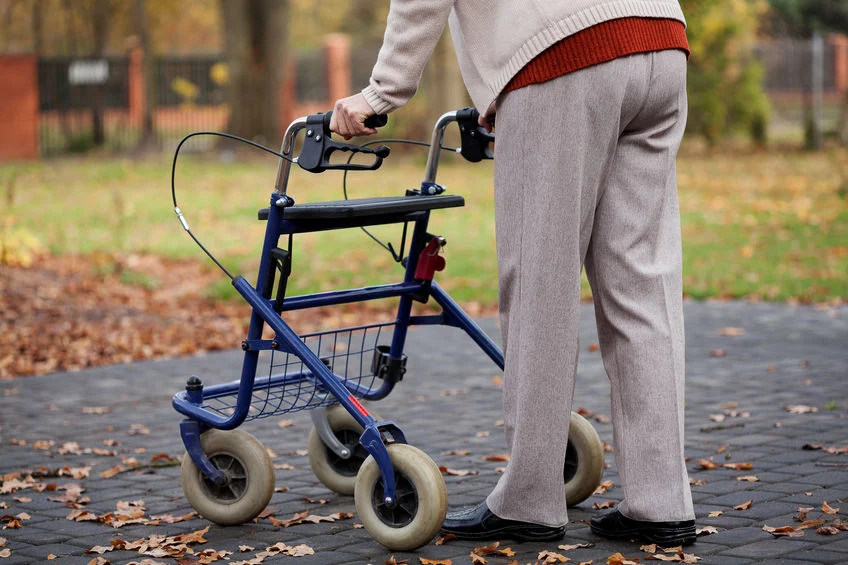
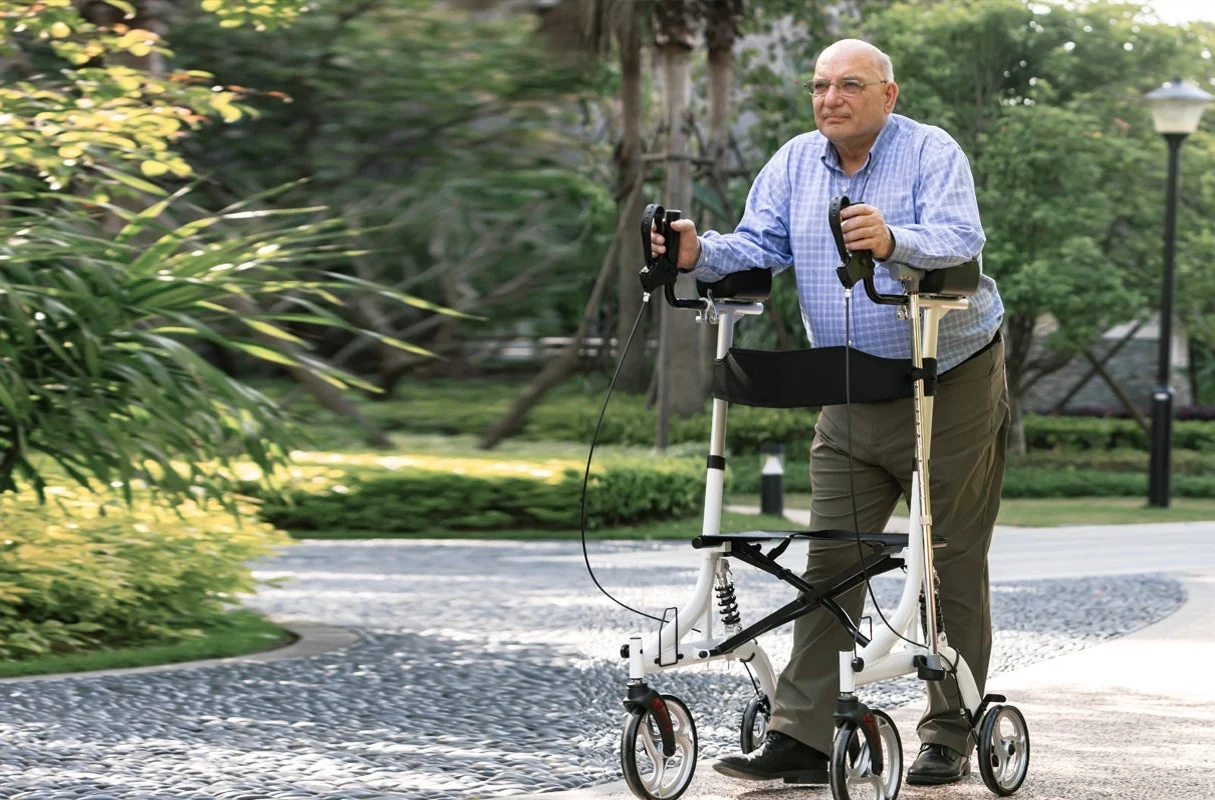
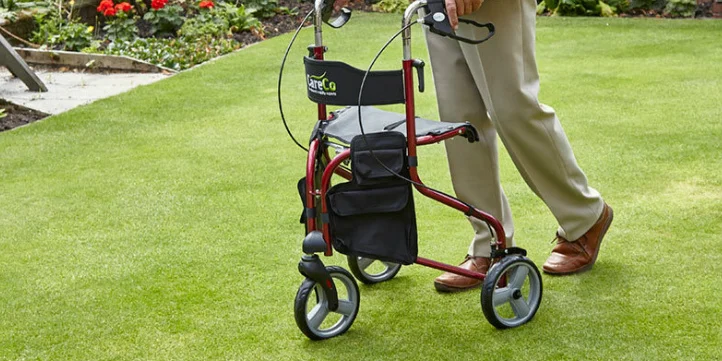
Consider Mobility Aid Upgrades: If balance and strength allow, wheeled walkers (rollators) might cause less floor friction since they roll rather than drag. Modern rollators with rubber tires rarely mark floors. However, prioritize safety needs over floor concerns – there’s usually a protection solution for any walker type.
Enjoy Your Hardwood Floors and Walker Together
Learning to use a walker brings enough challenges without worrying about floor damage. Fortunately, simple modifications can dramatically reduce walker-related scratches and scuffs. From classic tennis balls to high-tech glide skis, solutions exist for every budget and need.
These floor protection strategies empower seniors and caregivers to prevent damage before it occurs. Prevention proves much easier than repair, so implement solutions as soon as walkers enter your home.
Protecting floors isn’t just about appearance – it reduces cleanup and eliminates hazards like splinters or uneven gouges. By walker-proofing your home, you create safer, more comfortable living environments for everyone.
Getting used to new walkers takes time, but don’t get discouraged. With floors properly protected, you can focus on the real goal: staying mobile and independent. Each solution removes one worry from daily walker use.
You may need to experiment finding perfect combinations – perhaps tennis balls plus hallway runners, or glide caps with strategic rugs. Once you find what works, you’ll move freely without fearing floor damage.
Remember, a few scuffs are small prices for mobility, but with these tips, you might not pay that price at all. Enjoy both your beautiful hardwood floors and your helpful walker – you can definitely have both!

Protecting Hardwood Floors from Walkers FAQ
What can I put on the bottom of a walker to protect hardwood floors?
Popular choices include tennis balls (slipped onto the walker legs), plastic ski glides, rubber or felt walker foot pads, and walker glide caps or “coasters.” All of these create a buffer between the metal walker legs and your hardwood floor, preventing scratches. Even simple DIY fixes like thick felt circles or knitted “walker socks” can work. The goal is to cover the walker’s tips with something softer than the floor.
Each solution has its pros and cons (for example, tennis balls are cheap and quiet but collect dirt, whereas plastic glides are cleaner but slide more easily). In many cases, the best approach is a combination – for instance, using ski glides on the back legs and tennis balls or caps on the front, depending on the walker type.
Are tennis balls on walkers safe or effective for wood floors?
A: Tennis balls are a tried-and-true hack to protect floors and help walkers slide, but they come with caveats. On the plus side, tennis balls on walker legs are very effective at preventing scratches and scuff marks – the soft felt exterior is gentle on hardwood and also muffles noise. They’re also extremely easy to put on and replace.
However, safety-wise, be cautious: tennis balls can make the walker move more freely, which is good for gliding but can be risky if the user leans heavily on the walker (the walker might slip forward a bit). They also get dirty over time, collecting germs and grime, so you should replace them regularly. Some physical therapists feel that purpose-built walker glides are safer because they’re designed for that use. In summary, tennis balls are effective for floor protection and commonly used – just monitor their condition and be aware of the slight change in how the walker moves (more slide, less grip). If the user is very unsteady, you might consider alternatives that don’t slide quite as much.
Which is better for floor protection: tennis balls or walker glides?
A: Both do the job, but they have different strengths. Tennis balls are great for floor protection and noise reduction – they’re soft, quiet, and provide a bit of friction so the walker doesn’t completely skate away. They’re also cheap and easy to replace. Walker glides (ski glides), on the other hand, are specifically designed for walkers: they’re usually made of smooth plastic that helps the walker slide effortlessly, and they don’t collect dirt or moisture like tennis balls do. This makes glides a cleaner and often longer-lasting solution.
For pure floor scratch protection, both are effective – neither will scratch your hardwood when used properly. The choice comes down to the user’s needs: if the person has limited strength and needs the walker to glide with minimal effort, ski glides might be better. If the person needs a bit more stability (more friction) and doesn’t mind replacing dirty covers, tennis balls might feel more secure.
Some people start with tennis balls and graduate to glides once they’re comfortable, or vice versa. It can also boil down to aesthetics and hygiene – glides look neater and won’t turn gray-brown over time like old tennis balls. You can always try both and see which one the user prefers – they are both inexpensive options.
How do walker glide skis prevent scratches on wood floors?
A: Walker ski glides are smooth attachments that effectively turn the walker’s feet into mini-skis. Because of their smooth plastic surface and curved front edge, they slide across hardwood instead of scraping it. There are no sharp edges or hard points dragging on the wood. Imagine the difference between dragging a rubber shoe vs. sliding a plastic sled – the sled (glide) moves without gripping.
By reducing friction, the glides ensure there’s no heavy pressure grinding into the floor finish, thus preventing scratches. One key point: to keep them scratch-free, you should keep the glides clean. Grit or tiny stones caught under a glide could potentially scratch the floor, so just wipe the glide bottoms occasionally. But in general, ski glides are designed specifically to be floor-friendly and glide rather than gouge. Many people find that with glides, they don’t see any of the scuff marks that a rubber tip or metal edge might have caused before.
Will walker wheels scratch my hardwood floor?
A: They can, yes. It depends on the type of wheel. Many standard walker wheels (like on the front of a two-wheeled walker or on a rollator) are made of hard plastic. Hard plastic wheels can leave scuff marks or light scratches on hardwood, especially if grit gets embedded in them or if they’re dragged when locked. If the wheel’s tread is worn down, the hard plastic edge might contact the floor directly, potentially leaving black marks or scratches.
Rubber wheels (or wheels with a rubberized tread) are much gentler on floors – they usually won’t scratch and have better grip. If you notice scuff marks from walker wheels, first try cleaning the wheels thoroughly; sometimes they pick up grime that then transfers as marks on the floor. If that doesn’t help, you could consider replacing the wheels with a different type (many mobility supply stores sell non-marking walker wheels or rubber tire kits).
Another tip: make sure the person isn’t pushing the walker sideways or pivoting the wheels in place too harshly, as that can cause scuffing. And as a protective measure, you can use the same idea as furniture pads: there are even stick-on wheel covers or soft tape that some people use on walker wheels, though generally it’s better to just get floor-friendly wheels. In summary, wheels can scratch, but with proper maintenance and the right type of wheel, hardwood damage is rare.
Can I use rugs or carpets to protect my hardwood floors from a walker?
A: Yes, strategically placed area rugs or runners are a good way to shield your hardwood from walker traffic. By covering the areas where the walker is used most, you create a buffer so the walker isn’t coming into direct contact with the wood. For example, you might put a long runner down a hallway and rugs in the living room where the person maneuvers the walker. This definitely cuts down on scratches and wear.
However, you must choose rugs carefully and use them correctly: they should be low-pile (not thick and plush) so the walker can roll over them easily. The rugs must be secured – use non-slip pads or rug tape so they don’t slide on the wood. The last thing you want is the rug slipping and causing a fall. Also, consider the edges: a rug with a high edge or fringe can catch the walker’s legs, so something with a thin edge is best.
Many people use flat woven rugs or even those clear vinyl floor runners (which have grips on the bottom) in hallways. And remember, a rug doesn’t cover everything – the floor between rugs can still get scuffed, so ideally combine rugs with the walker leg solutions. In short, rugs are helpful and provide extra protection (and can cozy up the home), just be vigilant about keeping them flat and skid-free for safety.
Q7: How often should I replace the caps, balls, or covers on my walker?
A: Regular maintenance is important. The frequency of replacement depends on usage and which type of protector you’re using:
- Tennis balls: These might need replacing every couple of months if the walker is used daily on rough surfaces, or whenever they start looking very worn, dirty, or wet. If they start to tear or the fuzzy surface is gone, swap them out. They’re cheap, so it’s better to change proactively.
- Felt or rubber pads: Check them every few weeks. If you notice the pad has flattened out, is peeling off, or has collected a lot of dirt that you can’t easily clean, it’s time for a new one. Typically, felt pads on a walker might last a month or two with heavy use before needing replacement (sometimes longer if the person is light or usage is minimal). Rubber pads can last longer but will eventually wear smooth or crack.
- Walker glides (ski glides): These are usually made of durable plastic and can last several months to a year or more. Replace them when you see deep grooves or when they don’t firmly stay in the leg anymore. Also, if one cracks or the glide’s shape wears down (flattening of the ski curve), get new ones.
- Glide covers (fabric): These will need washing whenever they get dirty, and replacing perhaps every few months if the fabric thins out. If holes appear in the bottom, it’s time to retire that pair.
- Walker leg caps (rubber/plastic tips): These are quite durable. You’ll know to replace them when the texture on the bottom is worn away (if it becomes very smooth, it may start to slip) or if you see cracks in the rubber. Often, rubber tips can last 6+ months, whereas plastic glide caps might last even longer unless used outdoors a lot.
In general, a good practice is to inspect the walker’s feet weekly. If anything looks damaged or ineffective, replace it. It’s a small cost for peace of mind. Keeping some spare tennis balls, pads, or an extra set of glides around is wise so you can swap them out as needed without delay.
Can I make DIY walker leg covers at home instead of buying special ones?
A: Absolutely! There are several easy DIY approaches:
- Tennis Balls: The classic DIY – just cut an “X” in two tennis balls (for a front-wheeled walker, you’d put them on the rear legs) or four balls (for a walker with no wheels) and push them onto the legs. Many people do this and it works well. If you’re not comfortable cutting them yourself, pre-cut ones can be bought, but doing it at home is usually straightforward with a sharp knife or box cutter (be very careful and use a vise or ask someone handy to help).
- Furniture Pads or Felt: You can stick heavy-duty felt furniture pads (the kind for chair legs) onto the walker feet. If pre-cut pads don’t fit, buy a sheet of thick felt from a craft store, trace a circle around the walker leg, and cut it out. Then use a strong glue (like epoxy or super glue or even heavy-duty double-sided tape) to attach it to the bottom of the leg. This essentially creates custom felt tips.
- Old Socks or Fabric: Like the “walker socks” idea – take a thick old sock, cut about 4-5 inches from the toe end, and pull those mini-socks onto each walker leg. You might double them up if one layer is too thin. An old sweater sleeve or a piece of fleece can be sewn into little pouches that fit over the legs as well. Use a rubber band around the top to hold them in place if needed.
- PVC End-Caps: For a more hardware-based DIY, some folks use PVC pipe end-caps (found in plumbing sections of hardware stores) that fit the walker leg diameter. You can glue a piece of rubber (cut from an old rubber jar opener or a sandal) to the bottom of the cap. Then pop that onto the walker leg. Presto – a homemade glide cap! Make sure it fits snugly.
All these DIY solutions can work nicely. Just keep an eye on them as they wear. And if one method isn’t holding up, it’s okay to invest a few dollars in the purpose-made attachments – they exist because people had the same problems and needed more durable fixes. But there’s no harm in trying DIY first with materials you have at home.
What else can caregivers do to minimize a walker’s impact on hardwood floors?
A: Aside from the physical modifications and floor coverings we’ve discussed, caregivers can play a big role in prevention and maintenance:
Balance Floor Care and Mobility: At the end of the day, the caregiver’s priority is the senior’s safety. So if ever a floor-protection measure seems to make using the walker harder, the caregiver should adjust the plan. There’s always another way to protect the floor that might be a better fit. It might be a bit of an ongoing project, but with both senior and caregiver attentive, they’ll reach a good equilibrium where the home is safe for both the person and the hardwood floors!
Routine Checks: Make it a routine to inspect the walker tips and the floors. A caregiver might notice scratches forming in a certain spot (maybe near a doorway) and can then add a rug or remind the senior to be careful in that spot. Early detection of wear on the walker’s protectors means they can be replaced before any floor damage happens.
Keep it Clean: Ensure the walker’s wheels or legs are clean when coming in from outside. Wipe them down at the door if necessary. Also, keep the floors clean as mentioned – a quick daily sweep where the walker rolls can do wonders. Caregivers can help by doing that sweeping or dry mopping if the senior can’t.
Furniture Layout: Arrange furniture to create clear paths for the walker. If the senior isn’t bumping into furniture or doing tricky maneuvers, there’s less chance of scrapes on the floor (and on the furniture). The caregiver might, for example, move a coffee table a bit to widen a path, so the walker isn’t scraping along the side of it or forced into a tight turn on the floor.
Education and Support: Encourage and remind the walker user about using any brakes, lifting the walker properly (to the extent they can), and not rushing. Sometimes floors get scratched when someone tries to shove a walker sideways or drag it while turning. With gentle coaching, a caregiver can help the person use the device in a floor-friendly way – like advising, “Let’s lift it a little here to get onto the rug,” or “Don’t forget to clean the tennis balls this week.”
Product Solutions: A caregiver can research and buy products (since many seniors aren’t shopping online). For instance, finding a good set of glide caps on Amazon, or a nice-looking rug that doesn’t clash with home decor, etc. They can also install these items – cutting tennis balls or applying pads safely – so the senior isn’t trying to do something that could risk injury.
Research and References:
- Disabled World – “Lose the Tennis Balls” Campaign (NOVA Medical Products): Explains why putting tennis balls on walkers can be unsafe and unsanitary site:disabled-world.com.
- Medical Xpress Blog – Skis, Wheels, or Balls: What Are the Best Feet for Your Walker? (2021): Discusses pros and cons of tennis balls vs. ski glides vs. wheels on walkers site:mxp4u.commxp4u.com.
- CaregiverProducts.com – Product description for Easy to Use Walker Coasters: Highlights that unlike tennis balls, plastic walker coasters do not absorb water or collect debris and have smooth edges that won’t snag on flooring site:caregiverproducts.com.
- RespectCareGivers.org – How to Protect Hardwood Floors from Walkers: Provides tips on using pads, glides, and rugs; notes issues like pads collecting dust/pet hair and suggests using anti-slip mats under area rugs site:respectcaregivers.org.

