Walkers are fantastic mobility aids – when used correctly, they help you stay steady on your feet and maintain independence. Whether you’re recovering from an injury or surgery, or finding balance a bit harder with age, learning proper technique is essential when using walkers for seniors, as correct posture and movement significantly reduce fall risk.
In this guide, we’ll cover everything from setting up your walker to walking, turning, and even sitting down with it. We’ll also answer common questions about using walkers in different scenarios (like outdoors or after a hip replacement) so you can move around with confidence. Let’s get started on using your walker the right way – it’s easier than you might think, and a few simple tips will ensure you get the maximum benefit without mishaps.
By Nan J.Corbo | ✅ Reviewed by Ray Butcher |
SeniorFitness is reader-supported. We may earn a commission through products purchased using links on this page. Learn more about our process here
TL;DR: Using a walker safely involves adjusting it to the right height, using proper technique to stand, walk, turn, and sit, and taking precautions on different surfaces. Technique varies across different walker types, however your should always push up from your seat (don’t pull on the walker), step inside the frame (walker, weak leg, then strong leg), and engage any brakes when stationary. Go slow, keep your posture upright, and avoid using a walker on stairs. With the right fit and practice, a walker can greatly improve your mobility and confidence while preventing falls. As a bonus, using a walker correctly can significantly reduce instability, a topic we expand on in our structured senior fall safety and prevention hub.
What are rolling walkers

Historically, walkers were made to be moved by lifting them up and using tem as a frame to take your next step. This requires upper body strength and means it is not necessarily an option for people who have mobility issues. Choosing the right type of walker will make using it much easier. Here are the main types:
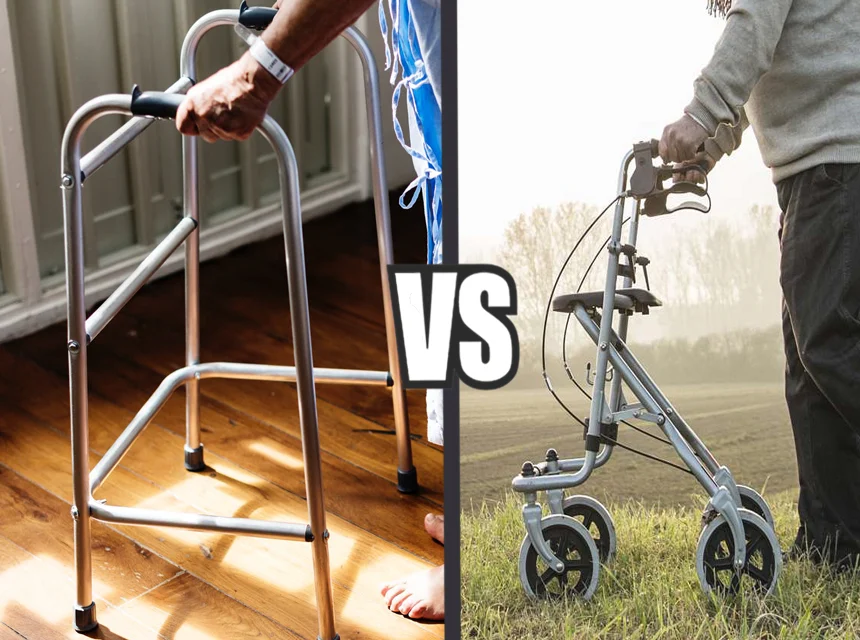
- Standard Walker (No Wheels): This is the classic walker: a lightweight metal frame with four rubber-tipped legs. It offers the most stability since it stands firmly on all four points. However, you need enough arm strength to lift it slightly and place it forward with each step. Standard walkers work best indoors or for short distances, since lifting them repeatedly can be tiring. They’re a good choice if you need strong support and move at a slower pace. (Cost range: often the least expensive type, around $30-$100 for basic models)
- Two-Wheeled Walker: Also called a front-wheel walker, this looks like a standard walker but with wheels on the two front legs and rubber tips on the back legs. You don’t have to completely lift this walker; you push it forward and the front wheels roll, while the back legs slide (you might attach tennis balls or ski glides to help them slide). This allows a more natural gait without lifting the entire walker. It’s great if you need moderate support but find a standard walker too slow or strenuous. Many people recovering from surgeries start with a two-wheel walker for extra stability. (Cost: roughly $50 and up, depending on features)
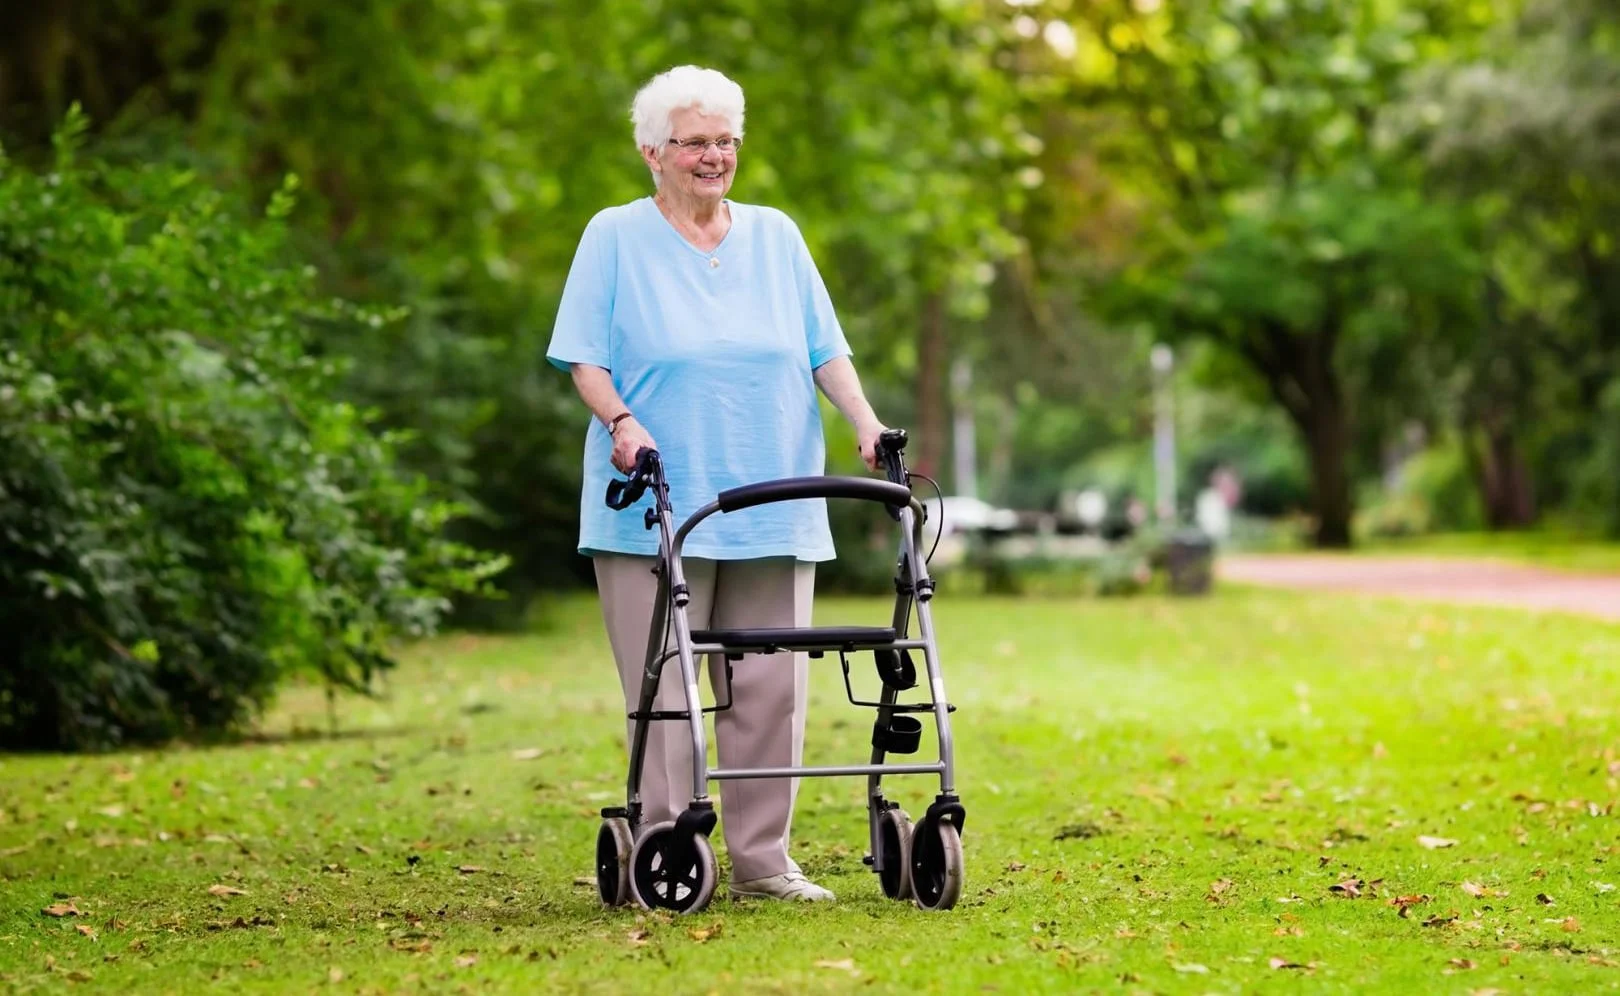
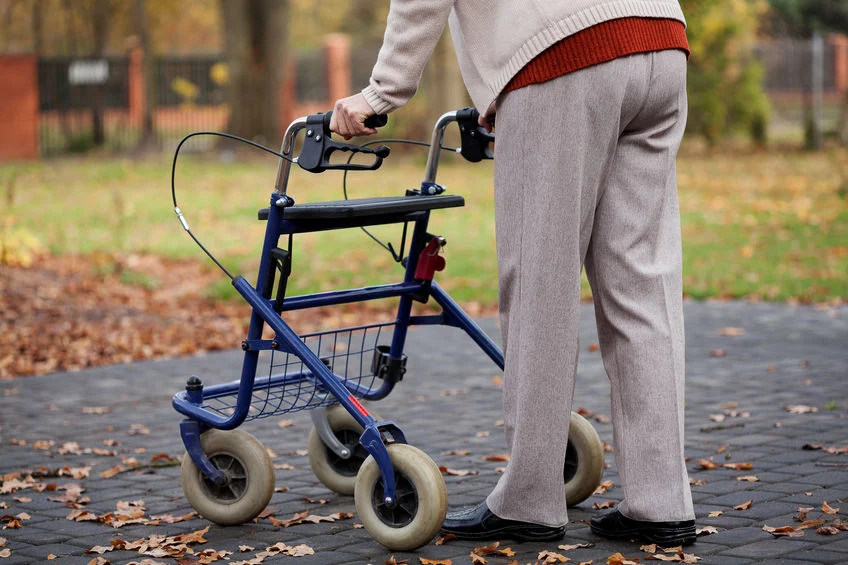
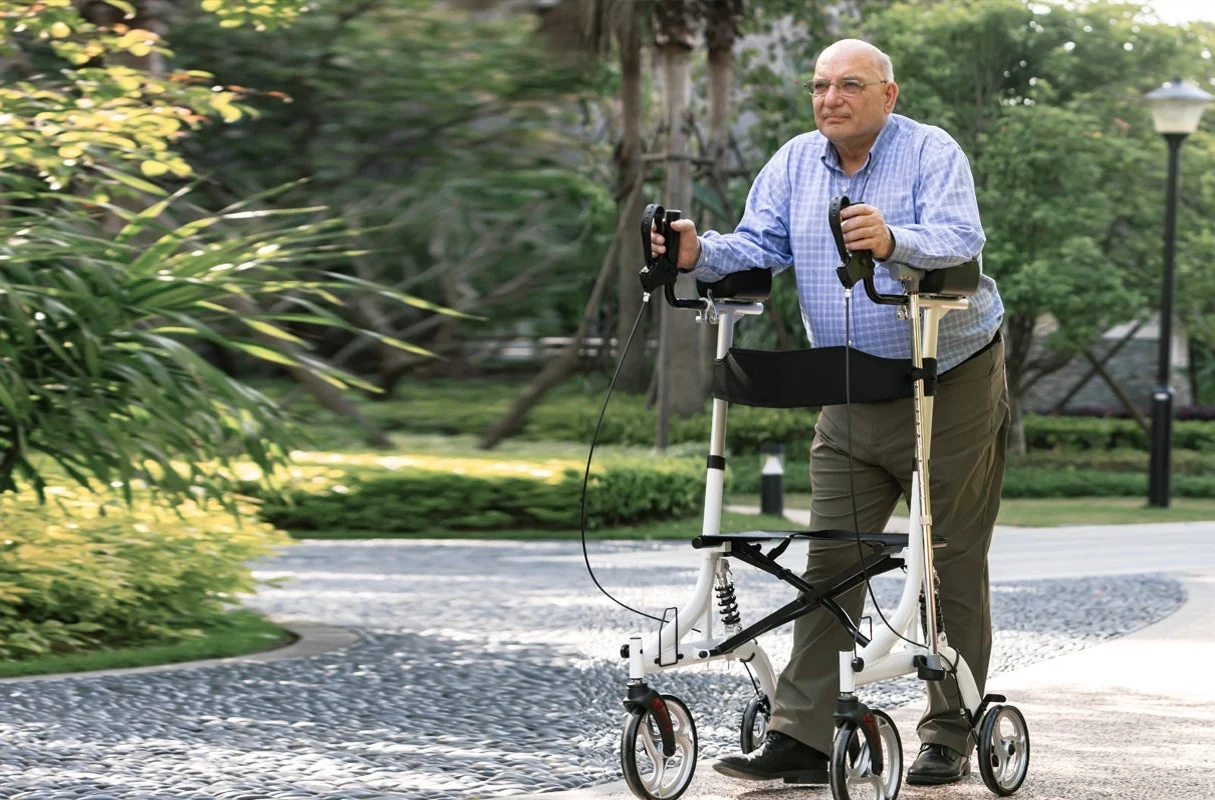
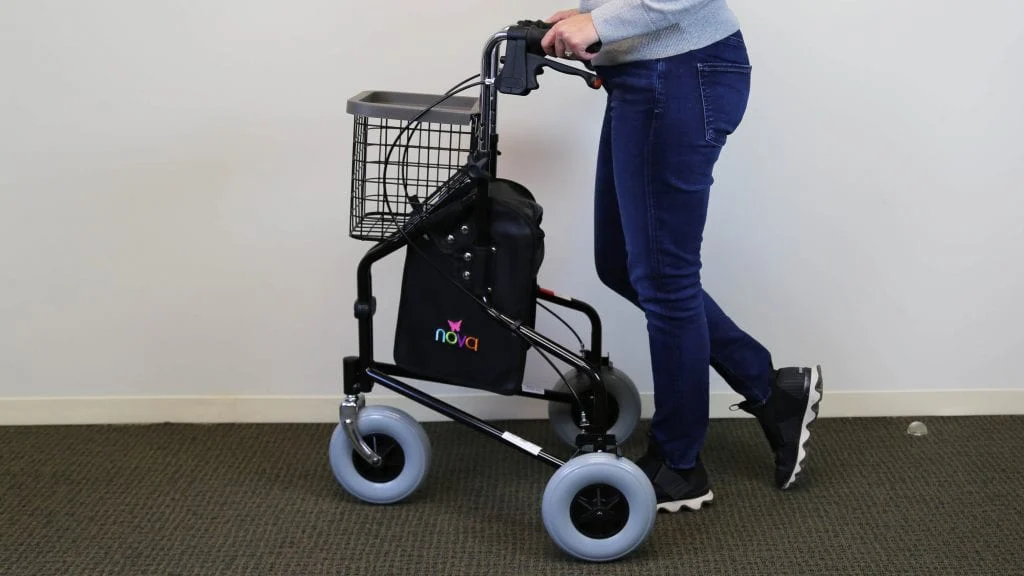
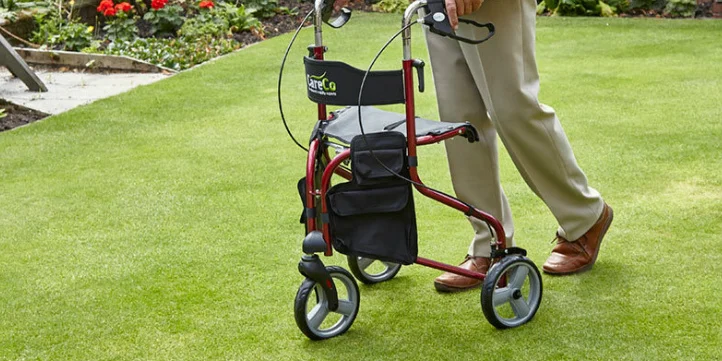
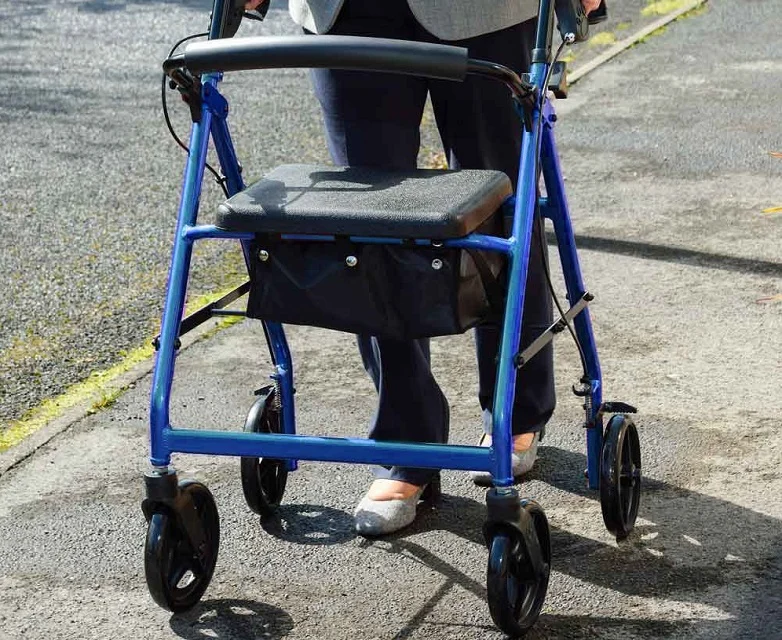
- Four-Wheeled Walker (Rollator): A rollator (rolling walker) has four wheels, hand brakes, and often a built-in seat. It’s the easiest to move – you simply push it like a cart – and it’s ideal for outdoor use or longer distances since it rolls smoothly. Rollators usually come with a seat for resting and a basket for convenience. Keep in mind that because it’s on wheels, balance and brake use are crucial. A rollator isn’t recommended if you must lean heavily on a walker or have very poor balance (a standard or two-wheel walker might be safer in that case). (Cost: typically $70 on the low end to $300+ for premium models, with some heavy-duty ones up to $600.)
- Hemi Walker: This is a one-handed walker (hemi = half). It’s designed for people who have use of only one arm/hand (for example, after a stroke or an arm injury). A hemi walker is held to one side of the body, like a cane, but it has a wider, four-legged base for more support than a cane. It folds out kind of like half a regular walker. This device provides more support than a quad cane but less than a full walker. Use a hemi walker if one arm is unusable but you still need significant help with balance on the affected side. (Cost: usually around $50–$100.)
Each type of walker has its pros and cons. If you’re unsure which you need, consult with a physical therapist or doctor. Using the right walker for your abilities is the first step to walking safely!
Who are they made for
Rolling walkers are made for anyone who needs assistance walking. A lot of the users are elderly, but people who suffer from degenerative conditions, or who are recovering from a serious injury or illness could also find that they are a really effective way to get back on their feet. A rolling walker might be an alternative to a mobility scooter. It can also help you to rebuild strength if you are planning to walk independently again in the future, or to keep your muscles working. If you use a scooter or a wheelchair, this independence could be lost.
Adjusting Your Walker for the Perfect Fit
Taking time to set up your walker properly is critical. With the right height and secure parts, you’ll be ready to walk with better posture and confidence, and you’ll reduce the risk of discomfort or falls. Before taking off with your new walker, make sure it’s adjusted to fit you. Here’s how to set it up:
- Height: Adjust the walker’s legs so that the handgrips line up with the crease of your wrist when your arms hang at your sides. When you hold the handles, your elbows should bend about 15-30 degrees – a comfortable, slight bend. This height allows you to stand upright inside the walker without hunching over or reaching up too high. Most walkers have push-button leg extensions for easy adjustment. Tip: Wear your usual walking shoes when measuring, as shoe height can affect this. The Drive Medical Nitro rollator has a handle height that can be adjusted between 33.5″-38.25″.
- Ensure It’s Level: If your walker has adjustable legs, double-check that each leg is set to the same height so the walker sits level on the floor. A wobbly, uneven walker is unsafe.
- Folding Mechanism: For walkers that fold, make sure it is fully opened and locked before use. Hear the “click” of any locking mechanism. (A half-folded walker could collapse on you – always verify it’s locked open!)
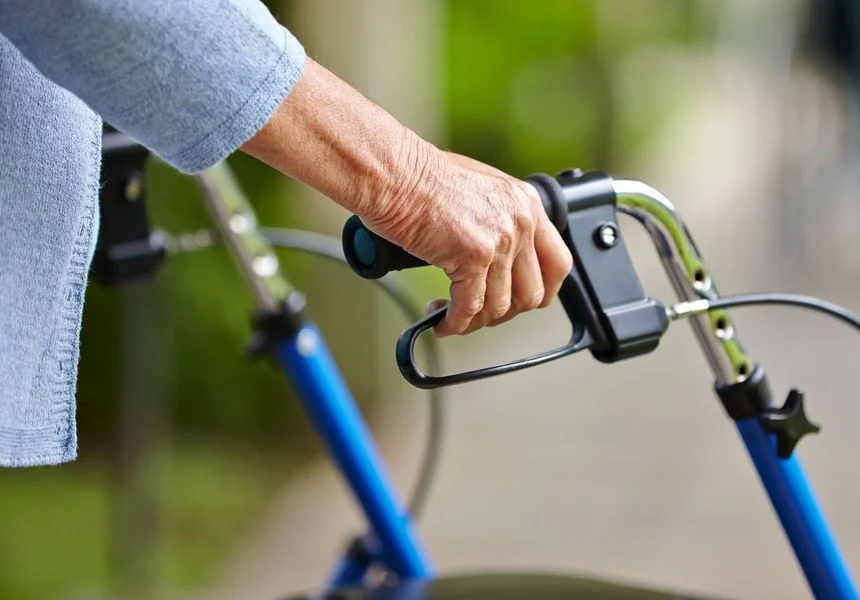
- Brakes: Safe walking depends on understanding walker brake operation. If you’re using a rollator (with hand brakes), test the brakes. They should engage firmly to stop the wheels. Most rollators have two brake functions: squeeze to slow down, and push down to “park” (lock the wheels). Ensure you know how yours works and that the brakes aren’t too loose or too tight. Always engage the parking brake when you stop or before sitting on a rollator seat.
- Add Accessories as Needed: Depending on your floors, you might add tennis balls or glide caps to the back legs of a two-wheel walker for smoother movement. If grip strength is an issue, consider cushioned handgrip covers. Adjusting for comfort can make a big difference in how secure you feel.
Each rollator will have an adjustment method to get the correct height. If you don’t do this, you may end up leaning in an uncomfortable position, and you could even get injured as a result. It’s easy to get back problems if you are constantly hunched. Check that you can comfortably access the brakes, usually positioned on the handles.
Using a Walker: Basic Techniques and Safety Tips
When you are standing, you will be able to set your rolling walker in position by using the brakes. A lot of rollators have a method that can allow you to keep the brakes held in place, such as a locked position. If you plan to stand still for a while, this can be a good option.
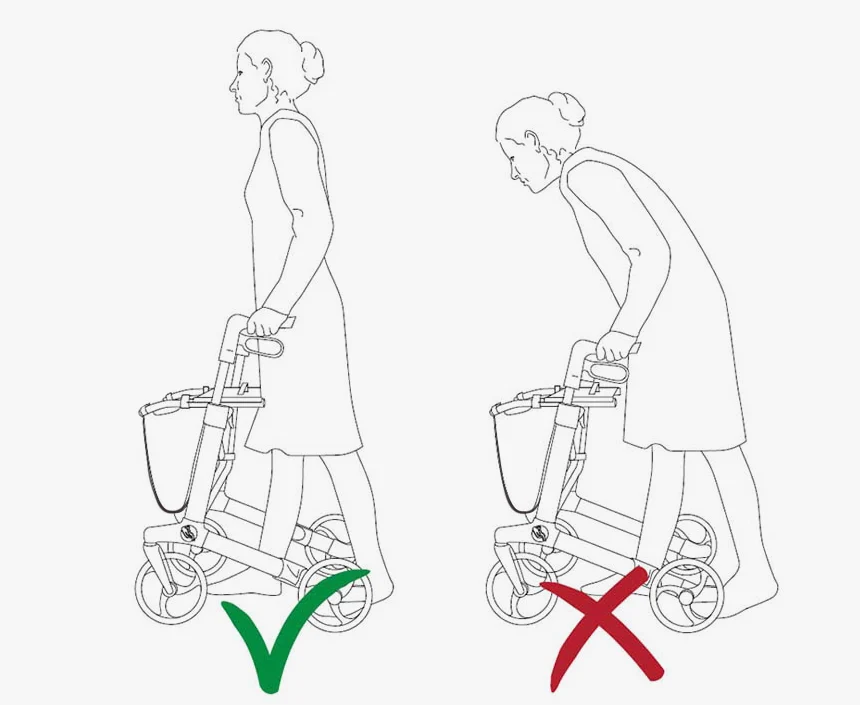
Proper Posture and Walking Technique
With your walker and you both in the right position, it’s time to walk. Using a walker may feel awkward at first, but soon you’ll find a rhythm. Here’s how to walk with a standard or two-wheel walker (and similar for rollators, with the added step of rolling):
- Inside the Frame: Stay inside the walker’s frame as you walk. That means your body is between the walker’s back legs, not trailing too far behind. If you stand too far back, you might lose support; too far forward and you could stumble into the front bar.
- Move the Walker First: Lift or push your walker about one step length ahead of you – roughly 6 to 8 inches forward, or whatever feels naturalmy.clevelandclinic.org. All four walker legs/wheels should land on the floor. Make sure you’re not extending it so far that you have to reach or lean — keep it comfortably within reach.
- Step with the Weaker Leg: Step forward with your weaker leg or injured foot firstmy.clevelandclinic.org. This might be the leg that had surgery, is in pain, or just feels less strong. By moving it first, you allow the walker to support more of your weight as that leg steps. Important: Don’t plant your foot too far—step to about the middle of the walker space, not all the way to the front bar. That keeps the walker stable.
- Step with the Stronger Leg: Now step forward with your stronger leg. As you do, bear some weight through your arms onto the walker’s handlesmy.clevelandclinic.org. Your stronger leg steps past the weaker one, ideally. At this point, both feet should be inside the walker frame.
- Repeat: Move the walker forward again, and continue the pattern. It’s walker, weak leg, strong leg, repeat. This rhythm keeps you balanced at each phase of the step. If you have to take very small steps at first, that’s fine. Go at your own pace.
- Don’t Look Down Constantly: It’s tempting to watch your feet, but try to look forward as you move. Every few steps, glance down to check placement if needed, but constantly looking at your feet can tilt your head forward and affect your balance. Looking forward also helps you spot obstacles in your path in advancemy.clevelandclinic.org.
For rollator walkers (4-wheeled walkers), the process is similar except you are rolling rather than lifting the walker. You can often take more continuous steps: roll the walker a bit, step, step, roll, and so on. Still lead with your weaker leg. Keep a little pressure on the handles as you roll, so the walker doesn’t get too far ahead. And be ready to squeeze the brakes if it starts rolling too fast.
Balance and posture tips: Keep your back as straight as comfortable, and your head up. If you notice you’re hunched over to reach the walker, stop and re-check your walker height (it might be too low). Your shoulders should be relaxed, not scrunched up. You’re aiming for a natural walking form, just with the walker providing extra support.
Turning and Changing Directions
Turning with a walker should be done carefully. Never twist your body sharply while your feet stay put – this can lead to a fall. Instead, do this:
Practice: Turning might feel weird at first, but practice in an open space with no obstacles. Over time, you’ll get a feel for how much space you need to maneuver. If the turn is too tight (like a small bathroom), you may need to take extra care or even take multiple small pivots to get around a corner.
Slow and Small: Rather than a big pivot, take small steps in the direction you want to turn. Think of it like making a series of mini-steps in a circle. Move the walker a bit toward the new direction, then step with your inside foot (the one closer to the direction you’re turning), then the other foot, reposition the walker, and so on. This way, you’re always supported.
Keep the Walker Close: Make sure the walker moves with you as you turn. Don’t leave it out to the side; always face the walker. If using a rollator, you can also turn the walker’s wheels gradually as you step—just avoid sharp, fast turns which could cause it to tip.
Using a Walker to Sit Down Safely
How can you use a rolling walker for sitting? A lot of walkers, including the Medline Freedom model, allow you to sit on your walker when you are tired. This is a great option when you need to wait in line, for example. Simply lock the brakes in position and you can enjoy the padded seat and backrest to recharge while you’re on the go. You’ll always have a seat when you need one. If you are adapting from spending time in a wheelchair then this can make all the difference.
Sitting down is essentially the reverse of standing up, but there are key safety points to remember so you don’t lose balance at that critical moment of lowering yourself. Here’s the proper way to sit down with a walker:
- Back Up to the Chair: Walk to your chair or bed and stop just short of it. Turn slowly and back up until you feel the chair touch the back of your legs. Having the chair touching your legs tells you that you’re in the right spot – you won’t miss the seat when you sit.
- Lock and Place the Walker: If it’s a rollator, lock the brakes now so it doesn’t roll away. Keep the walker in front of you; however, do not put all your weight on it as you begin to sit.
- Reach Back: This is crucial – reach for the chair with your hands. If the chair has armrests, reach for those. If not, reach for the seat or side of the chair. You might have to momentarily let go of the walker with one hand, then the other, as you reach back. (It’s okay, the walker will remain in front of you as a guard, but your weight should now transfer to the chair.)
- Lower Yourself Slowly: With your hands on the chair, bend your knees and slowly lower yourself down. Control the descent; don’t plop down hard. Your walker is in front of you but you’re not hanging onto it – your hands are on the chair for support. Keep your weak leg forward a bit as you sit (if one leg is recovering, sticking it out slightly can reduce strain as you sit).
- Settle Safely: Once seated, you can move the walker aside if it’s in your way, or leave it in front if you’ll need it again soon. If it’s a rollator, keep those brakes locked until you’re ready to get up again.
The biggest mistake to avoid is trying to sit while still holding the walker with both hands. Never flop into a chair with your hands on the walker – it can roll or tip and you’ll fall. Always transfer your hands to the chair to support yourself. Following the above steps ensures a controlled, safe seating.
Steps, curbs and other difficulties
Real life isn’t always flat and obstacle-free. You might encounter curbs, a single step, or the need to manage a threshold. Here’s how to approach these challenges:
Navigating Curbs and Single Steps
Curbs (like stepping onto a sidewalk or a single porch step) can be managed with care:
- Going Up a Curb: Walk as close as you safely can to the curb. Place the entire walker up on the curb first – all four tips/wheels up onto the higher level, as close to the edge as possible. Make sure it’s stable. If your walker has front wheels, you can tip it back slightly to get the front wheels up, then push forward to get the back legs up (many walkers have a small pedal on a rear leg called a curb assist to help leverage it). Next, step up with your stronger leg first (the leg that can bear more weight). Push down on the walker handles to help lift yourself. Then bring your weaker leg up. You’re up!
- Going Down a Curb: Again, get close to the edge. Lower the walker down first – place it fully on the lower ground while you’re still on the curb. Both walker wheels/legs should be touching the lower level before you step. Now, the opposite of before: step down with your weaker leg first. The walker is there to support you as that weaker leg goes down. Finally, step your stronger leg down. Remember “Up with the good, down with the bad” – good (strong) leg goes up first, bad (weaker) leg goes down first. This technique keeps your stronger leg doing the heavy lifting when climbing, and your weak leg leading when descending with support of your arms.
- Keep it Slow: Take curbs one at a time; don’t try to rush or do multiple steps in one go with a walker. After each step, regain balance with both feet on the same level before proceeding.
Note: If you ever feel a curb or single step is too high to manage with your walker, look for a nearby ramp or avoid that route. Safety first! And never try to use a walker on an escalator or moving walkway. (It’s extremely risky – opt for an elevator or ask for help if needed.)
What About Stairs?
Using a walker on stairs (a full flight) is generally not safe, and it’s strongly discouraged by health professionals. Standard walkers are not designed for stairs, and rollators are outright dangerous on stairs. Here’s what to do if you face stairs:
- Plan Ahead: If your home has stairs and you require a walker, consider setting up your living space so you can avoid the stairs (e.g., live on one level). Install ramps or stair lifts if possible. In some cases, people keep a second walker on another level of the home and navigate the stairs with a sturdy handrail (and possibly a cane or human help) – but this depends on your ability and must be practiced with a therapist.
- Get Help: If you absolutely must go up a few stairs with a walker and there’s no alternative, do not do it alone. Have someone assist you. The helper can carry the walker (or at least steady it) as you carefully use the handrail and hop or step up. For one or two steps, some people use a method where they fold the walker, place it sideways with two legs on the step above and two on the step you’re on, then use it more like a handrail to help step up. This is tricky and again, only to be done with professional guidance or assistance.
- Hemi Walker on Stairs: A hemi walker, since it’s smaller, still isn’t safe for typical stairs. Use the handrail and treat the hemi walker like a cane if you attempt a step, but ideally avoid this.
The bottom line: avoid stairs or steps when using a walker. Even a single step can be hazardous; multiple stairs are a no-go unless you have trained assistance. It’s often stated in medical guidelines: “Never climb stairs or use an escalator with your walker.” If you find stairs unavoidable in daily life, speak with an occupational therapist for safe alternatives and training.
Using a Walker Outside
Many people wonder if they can take their walker to the park or simply out and about. Yes, you can – but outdoor use comes with additional considerations:
- Choose the Right Walker for Outdoors: Generally, rolling walkers (either two-wheel or four-wheel rollators) are better for outdoor terrainmy.clevelandclinic.org. The wheels help navigate small cracks or bumps. Standard walkers without wheels can catch on rough ground and are best for indoors. If you only have a standard walker and need to go outside, you might add tennis balls or ski glides to help it slide, but still use caution – the tips can wear out quickly on pavementwww2.gov.bc.ca.
- Watch the Terrain: Even with a wheeled walker, uneven ground like grassy lawns, gravel paths, or cracked sidewalks require attention. Move slower and make sure all wheels contact the ground before putting weight on the walker. Avoid soft sand or mud, which can stop a walker leg in its tracks. If the ground is too uneven (e.g., a hiking trail), a walker might not be the best device – maybe a cane or all-terrain walker or having assistance would be safer.
- Weather Cautions: On wet or icy days, walkers can slip too. Wet rubber tips might slide, and wheels might not grip on ice. If you must go out, ensure the walker’s rubber parts are in good condition (not worn smooth). Consider rubber cane tips with ice spikes for winter, or simply avoid icy surfaces. In rain, take care that hand grips don’t get slippery; some walkers have foam grips to help with this.
- Take It Slow: Outside, there’s often more space to move – which sometimes leads to people moving faster. Stick to a comfortable, controlled pace. Rushing with a walker, especially a rollator, can lead to loss of control (some rollators can pick up speed on slopes). If going down an incline, activate the brakes lightly as a drag, or take very small steps.
- Be Mindful of Obstacles: Outdoor settings have curbs (discussed above), plus things like door thresholds, ramps, or even pet dogs running around. Scan ahead of you. If you’re approaching a door, try to have someone hold it open; doors can be tough to manage with a walker.
Using a walker outside can greatly extend your independence – you can go shopping, visit a neighbor, or get fresh air at the park. Just be sure to use a walker suited for the task (many find a rollator ideal for outdoors because of its larger wheels and a handy seat to rest on). Always prioritize safety: if an area looks tricky (e.g., construction zone, deep grass, etc.), it might be best to avoid it or ask for assistance.
Closing and locking a rolling walker
This is vital, especially if you are going to sit or stand in one position for one period of time. First, apply the brakes that you use with your hands. This allows you to keep the walker in place. Next, you need to either lock the brakes (some have a setting where they can click in place and keep it locked for a long time without having to keep your hands on it.
Some models have a strap to lock in this position, too. Be aware that you need to ensure it is locked in place before sitting or standing still without keeping your hands on the brakes situated on the handle.
Tips for Different Walker Types (Special Considerations)
We’ve touched on this earlier, but let’s summarize some specific tips depending on which walker you’re using. Each type has a slightly different technique:
Using a Standard or Two-Wheeled Walker:
These walkers support a lot of weight but require a certain gait:
- With a standard walker, remember you must lift all four legs off the ground slightly to move it. Don’t try to slide it – the rubber feet will resist. Lift, set it forward, then step. This lift-and-place technique ensures stabilityevolutionwalker.com. It may feel like a “step pause, step, step, pause” rhythm.
- With a two-wheel walker, you will push the walker rather than fully lift it. The front wheels roll forward as you step, and you then slide the back legs (or partially lift the back, whichever is easier). Avoid dragging the back legs continuously – it can catch on rugs or cracks. Instead, develop a habit of slightly lifting the back end or using walker glides.
- In both cases, take care on uneven surfaces – a wheel-less walker can snag, and a two-wheel walker can tip if one wheel goes over a bump and the other doesn’t. Approach transitions (like from carpet to floor or over doorway bumps) straight on.
Using a Four-Wheeled Rollator Walker:
Rollators are easier to propel but require more control:
- Always use the brakes when needed: If you’re about to sit, or if you start picking up too much speed, squeeze those hand brakes. When standing from a chair using a rollator, lock the brakes so it doesn’t roll away from you.
- Hand Strength: Ensure you have enough hand strength to use a rollator. Squeezing and holding brakes on a long downhill, for example, takes some grip. If arthritis in your hands is severe, a rollator might not be ideal (a two-wheel walker might be safer).
- Turning: Because all wheels swivel (typically the front ones), a rollator can turn quickly. Slow down before turns to prevent tipping. Keep your body within the frame as much as possible.
- No Riding!: It might be tempting to use the rollator’s built-in seat like a wheelchair by sitting and pushing with your feet – don’t do this. Rollators are not designed for that and can tip easily if used as makeshift wheelchairsultimatecareny.com. Only sit on the seat when stationary (with brakes locked) to rest.
- Check the Hardware: Over time, check that the rollator’s wheels are secure and the brakes are well-adjusted. If you notice wobbling wheels or weak brakes, get them serviced. A little maintenance (tightening bolts, etc.) goes a long way in safetyevolutionwalker.comevolutionwalker.com.
Using a Hemi Walker (One-Handed Walker):
This device is like a wide-base cane, and has its own technique:
- Placement: Hold the hemi walker on your stronger side. If your right side is stronger, the walker goes on your right side.
- Gait Pattern: Typically, you will move the hemi walker and your weaker leg forward togethercaring-for-aging-parents.com. For example, if your left leg is weak and you hold the hemi walker in your right hand (stronger side), you would step your left leg forward while simultaneously moving the hemi walker forward. This mirrors how one would use a cane – cane and opposite leg together.
- Then, step through with your stronger leg (in this example, the right leg) while pressing down on the hemi walker for support. Now you’ve completed one cycle.
- Balance: It takes practice to coordinate. In the beginning, you might do it in three distinct steps (walker forward, weak leg forward, then strong leg). As you get confident, it becomes two steps (walker + weak leg together, then strong leg).
- Safety: Make sure the hemi walker is fully opened and locked before use (many models fold flat). All four feet of it should land on the ground each time you set it down – it’s easy to accidentally place it at an angle if you’re not careful. Also, since only one arm is on the walker, pay extra attention to posture (don’t lean too much to one side).
- Who Should Use: Remember, hemi walkers are meant for those who cannot use both arms to manage a regular walkercaring-for-aging-parents.com. If you can use both arms, a standard or wheeled walker will typically give more stability.
No matter the type, always follow the manufacturer’s instructions and any training from your healthcare provider. Each walker might have slight differences (for instance, some rollators have a different brake locking mechanism) and the use of accessories change how a walker is used daily. So go and find your perfect fit and maximise your mobility with the right walker for you.
References
- Walker (mobility) – Wikipedia – Walkers started appearing in the early 1950s. The first US patent was awarded in 1953 to William Cribbes Robb, of Stretford, UK, for a device called “walking aid”, which had been filed with the British patent office in August 1949. Two variants with wheels were both awarded US patents in May 1957, and the first non-wheeled design that was called a “walker” was patented in 1965 by Elmer F. Ries of Cincinnati, Ohio. The first walker to resemble modern walkers was patented in 1970 by Alfred A. Smith of Van Nuys, California.
FAQ: How to Use a Walker
Q1: How much do walkers cost?
A: Walkers come in a range of prices depending on type and features. A basic standard walker (no wheels) is usually the most affordable, often around $30 to $100 for a good quality model. Two-wheel walkers and hemi walkers might cost a bit more, typically in the $50–$150 range. Four-wheel rollator walkers with seats and brakes are on the higher end – they can start around $70 and go up to a few hundred dollars for premium models. Fancy features (like extra-lightweight frames, fold-down seats, or storage) and heavy-duty bariatric models (for higher weight capacity) will increase the price. Always balance cost with the features you need; sometimes spending a bit more for a lighter weight or easier-to-use walker is worth it.
Q2: How much does a walker weigh?
A: It varies by type. Standard aluminum walkers (no wheels) are lightweight, often weighing about 5 to 6 pounds – easy to lift with each step. Front-wheeled walkers (two-wheel) are slightly heavier due to the wheels, roughly 7 to 8 pounds on average. Four-wheel rollators have the most components (wheels, brakes, seat), so they’re heavier – many rollators weigh between 15 to 20 pounds (steel models can be over 20 lbs, lightweight aluminum ones closer to 14-15 lbs). Hemi walkers are fairly light, often around 3 to 4 pounds, since they’re basically half a walker. When choosing a walker, weight matters for lifting and transport. If you’ll be lifting it into a car or picking it up often (like a standard walker), opt for lighter models. Keep in mind, walker weight is different from weight capacity (how much weight it can support), so check both specs. (For a detailed comparison of different walker weights, see our walker weight guide)
Q3: How do you use a walker to go upstairs or downstairs safely?
A: Generally, you should not use a walker on stairs – it’s risky. If it’s just one step or a curb, use the technique we described: “Up with the good, down with the bad.” To go up one step: put the walker up on the higher step, then step up with your strong leg first, followed by your weaker leg, using the walker for support. To go down one step: place the walker down on the lower level first, then step down with your weaker leg, followed by the strong leg. For multiple stairs, it’s best to use a handrail and have someone help you (and have them carry the walker, or use an alternate device like a cane on the stairs). If you must attempt a couple of stairs with a walker and no railing, you could fold the walker and turn it sideways for support – but only do this with professional guidance. The safest advice: avoid stairs with a walker – use ramps or lifts whenever available for multi-step elevations.
Q4: Can you use a walker outside on grass or uneven ground?
A: Yes, but with caution. For outdoor use, a walker with wheels is recommended since it will roll over uneven surfaces more easily. A rollator (4-wheeled walker) is particularly good outdoors because of its larger wheels and often sturdier frame designed for both indoor/outdoor use. You can use a two-wheel walker outside on smoother paths, but be extra careful on grass or gravel – the front wheels might roll but the back legs can catch on soft ground. If using a standard (no-wheel) walker outside, every little bump means lifting the walker more, so it’s more challenging; plus, the rubber tips can wear out faster on concrete. When on grass, take slow, short steps and feel for stability before putting your full weight forward. Watch out for holes or slick spots. It’s also a good idea to add walker skis or all-terrain wheels for outside if your model allows – they help prevent the legs from sticking in the dirt. Always assess the terrain: packed gravel or pavement is manageable; sand or very uneven fields might be too much for a walker (a wheelchair or scooter might be safer in those cases).
Q5: How do I use a walker after a hip replacement?
A: After a hip replacement, your doctor or physical therapist will likely recommend a front-wheeled walker (or sometimes a standard walker) initially. The key is to protect that new hip while it heals. When walking, **push the walker forward, then step with your operated (surgical) leg first into the center of the walker, then bring your good leg forward. This “walker, bad leg, good leg” pattern ensures you’re not putting full weight on the new hip too soon – the walker supports you. You’ll also likely be told to follow hip precautions: avoid bending too far forward (like when picking something up – use a reacher tool if needed) and avoid twisting your torso. When sitting down or standing up, be cautious: keep your operated leg slightly forward to avoid too much bend at the hip, and use the walker for balance only after you’ve mostly stood up (as described earlier). Never use the walker to pull yourself up from a low seat after hip surgery – that could stress your hip and isn’t stable. Instead, push from the chair, then grab the walker. Go slowly, take small steps, and as your hip heals and gets stronger, you’ll likely transition to a cane and eventually walking without aids. Always follow the specific guidelines your healthcare team gives, as they may have tailored restrictions for your situation.